Su carrito de compras está vacío
 
English Polski Spanish 
Buscar un manual
 

(p.Ej. AA-V20EG JVC, ZX-7 Sony)
PayPal 1000+ rating Secure, Encrypted Checkout.
 
Usuarios conectados
Actualmente hay 5879 visitantes online.
Productos
Información
Destacado
Inicio >> JVC >> CU-V602J Manual de Usuario
 
 0 artículo(s) en Su carrito 

JVC CU-V602J
Manual de Usuario


¡Twitee acerca de este producto y obtenga $1.00 de crédito en la tienda para uso!
  • Descargable
  • Formato PDF
  • Manual completo
  • Idiomas: English
Precio: $4.99

Descripción del JVC CU-V602J Manual de Usuario

Manual del propietario completo en formato digital. El manual estará disponible para descarga como archivo PDF después de que lo compre.

El Manual del Propietario (a veces llamado Manual del Usuario o Guía del Usuario) contiene información sobre cómo utilizar su dispositivo. Después de colocar la orden le enviaremos las instrucciones de descarga a su dirección de e-mail.

The manual is available in languages: English

Not yet ready
You must purchase it first

Opiniones de los clientes
No hay comentarios de productos.

TEXT_PDF_SNIPPET
LYT0002-0V1A

INSTRUCTION

ENGLISH

CU-V602J
Be sure to consult your nearest JVC dealer when attaching the metal brace to the ceiling.

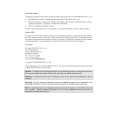
1. POSITION THE CAMERA LENS
Point the lens towards the side which has the video and audio output terminals.
Terminal

2. CHECK THE METAL BRACE POSITION
Before attaching the metal brace to the ceiling, first attach the camera to the metal brace to check the correct metal brace position. If a desirable metal brace position is not possible, attach the provided spacer around the bolt projecting from the metal brace.

Lens

Direction of the lens

Screw hole ø8 mm

3. ATTACH THE METAL BRACE
Select a section of ceiling which is made of material which will enable screws to be securely tightened. Place the metal brace on the ceiling so that the bolt projecting from it is positioned in the direction opposite of the camera lens. Align the screw* with the hole located on the metal brace, and screw it into the ceiling. Repeat for all 3 screws*. Make sure that the metal brace is firmly attached to the ceiling. * Use appropriate commercially available screws.

ø4.5 mm

Bolt

4. ATTACH THE CAMERA TO THE
METAL BRACE
Align the camera�s mounting socket with the bolt projecting from the metal brace. Then rotate the camera until the bolt is securely screwed into the mounting socket.
Align the camera�s mounting socket with the projecting bolt, then screw in until tight.

5. CONNECT THE CABLE TO THE
CAMERA
Use the provided AC Power Adapter and AV cable (20 m). Make sure that the cord is firmly connected to the terminal.

Quizás también quiera comprar

$4.99

SX-K700 TECHNICS
Manual de Usuario

Manual del propietario completo en formato digital. El manual estará disponible para descarga como …

$4.99

CJ-V51 PIONEER
Manual de Servicio

Manual de servicio completo en formato digital (archivo PDF). Los manuales de servicio por lo genera…

$4.99

GRAND PRIX ELECTRONIC 754 BECKER
Manual de Servicio

Manual de servicio completo en formato digital (archivo PDF). Los manuales de servicio por lo genera…

$4.99

SX-PR602 TECHNICS
Manual de Servicio

Manual de servicio completo en formato digital (archivo PDF). Los manuales de servicio por lo genera…

$4.99

EV-S1000E SONY
Manual de Usuario

Manual del propietario completo en formato digital. El manual estará disponible para descarga como …

$4.99

GRAND PRIX ELECTRONIC 780 BECKER
Manual de Servicio

Manual de servicio completo en formato digital (archivo PDF). Los manuales de servicio por lo genera…

$4.99

AG7330 PANASONIC
Manual de Servicio

Manual de servicio completo en formato digital (archivo PDF). Los manuales de servicio por lo genera…

$4.99

EVO-9850 VOLUME 1 SONY
Manual de Servicio

Manual de servicio completo en formato digital (archivo PDF). Los manuales de servicio por lo genera…
>
Parse Time: 1.595 - Number of Queries: 126 - Query Time: 0.663